![an open [sketch]book](https://blogger.googleusercontent.com/img/b/R29vZ2xl/AVvXsEg_HdD3YzhuCut1ArE3LmNgh0RGlDpbiE9u8cZTYWBXFnk0q-bn0wh2u9g-7UuX2W8k9gFhOOOvmJuE9QrkK10wVGdhGoyhooDoOwvKjA3NzFrqEZeOSIjysj7-w4QsSvhpUc_g/s1600/aos_2020logo_banner_blog.jpg)
Occasionally I'll receive questions about the various techniques I use in adding color to my drawings. With this in mind I thought I'd try something a little different and give a "virtual" demonstration of one of my favorite tools --markers--based off an actual demo from one of my classes last week.
As I tell my students, there are many ways to approach rendering with markers. What I'm presenting here is the way I normally work...but there are many other ways to do it. It's all about experimentation.
:::::one:::::
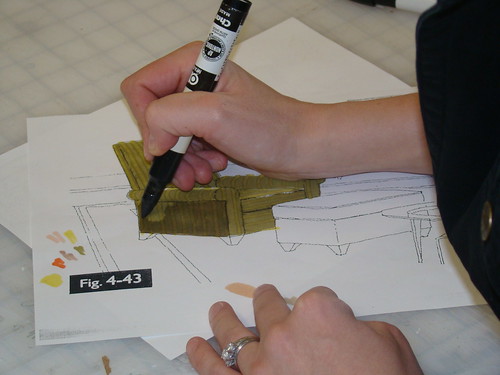
I begin by "outlining" the area in which I'm intend to add color. I'm careful to come in about a 1/4" from the boundaries of the drawing with this outline in order to prevent the marker from bleeding outside the lines. This boundary also forms a wall of sorts that prevents the wash of color I'm to apply next from going too far.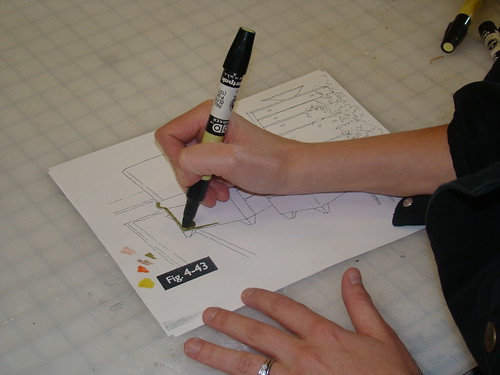
:::::two:::::
As I tell my students, there are many ways to approach rendering with markers. What I'm presenting here is the way I normally work...but there are many other ways to do it. It's all about experimentation.
:::::one:::::
I begin by "outlining" the area in which I'm intend to add color. I'm careful to come in about a 1/4" from the boundaries of the drawing with this outline in order to prevent the marker from bleeding outside the lines. This boundary also forms a wall of sorts that prevents the wash of color I'm to apply next from going too far.
:::::two:::::
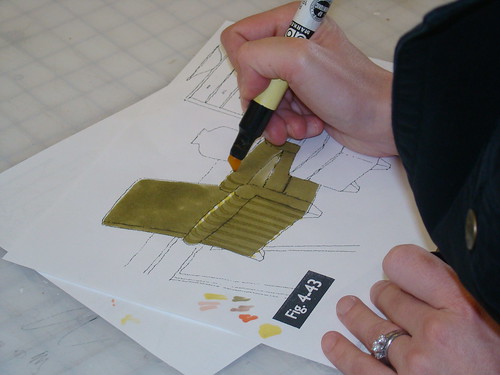
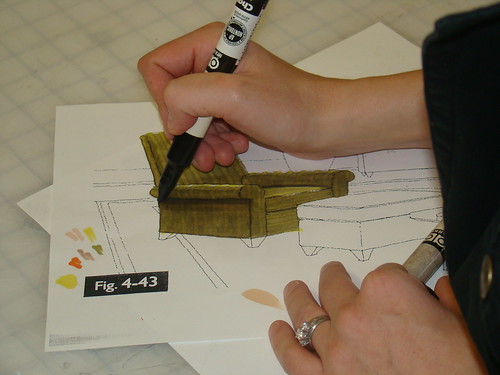
Next, I begin filling in the background color. In order to disguise my strokes (think crayola) I work in a "swirly" motion. You may also note that I've left areas at the top of the chair's arms and back white. It is very important to choose a direction of light and leave areas like this free of ink in order to convey highlights.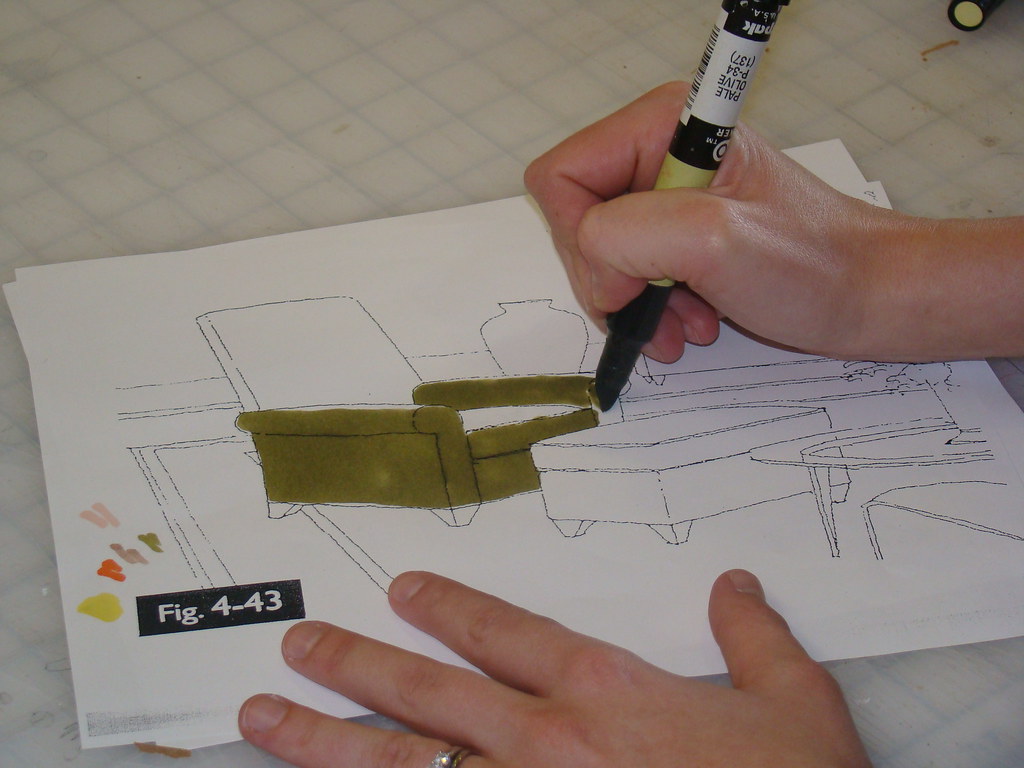
:::::three:::::
:::::three:::::
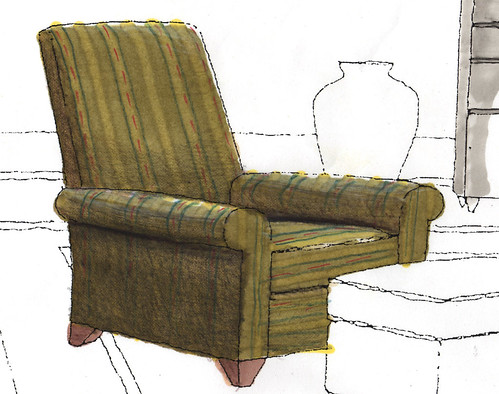
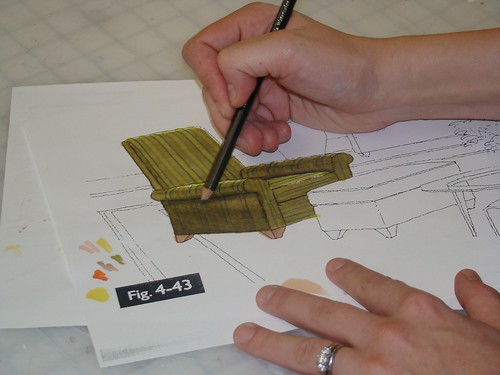
Rather than keeping the chair a solid color (boring!), I add a stripe pattern using a slightly another color marker. I'm careful to follow the contours of the chair in order to make it appear as though it is covered in a patterned fabric.
:::::four:::::
:::::four:::::
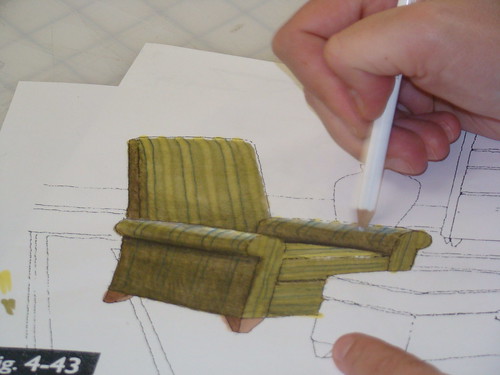
As I tell students, one could stop here. The chair is "colored in" after all. But, only when you add shadows and highlights does the magic start to happen. Paying attention to my imaginary light source, I begin to add shadow to areas of the chair with a light gray marker (in this case, Warm Grey #2).
:::::five:::::
:::::five:::::
To increase the drama, I go back with a darker grey (Warm Gray #5) to add more shadow to the areas underneath the armrests and around the seat cushions.
:::::six:::::
:::::six:::::
The marker creates a smooth surface. In order to add some texture and further emphasize shadows, I add an additional layer of dark colored pencil to the shadows. In many instances, it pays to do this in a color other than black...like dark brown or a color that contrasts, and thus subdues, the original background color.
:::::seven:::::
:::::seven:::::
At this point I'm almost done, but add a little more emphasis to the highlighted areas with a white colored pencil. If you have a white pen, this can also help to add sparkle to areas of your drawing. This works especially well when conveying hard interior surfaces like polished concrete or aluminum.
:::::eight:::::
To make this a more finished rendering, I would need to cast shadows onto the floor and other surroundings...but that's another day...
When it comes to markers, I prefer Chartpak AD markers. They last a long time and blend very, very well. With this blending, comes some bleeding, but that can be avoided with practice and the right paper.
For this exercise I was working on a copy of a drawing from Michael Doyle's Color Drawing. I highly recommend this book as a source of inspiration.
Could you get past my need for a manicure to find this helpful? If so, please leave a comment! This way I'll know whether to try this sort of thing again.
54 comments:
That was very Cool!! Please do that often!
Looks great and I love seeing your process. Yes, yes please continue to post tutorials!
yes, I agree. Please add more tutorials like this!
Definitely helpful! I think you should do this again - for sure!
Just by the thumbnail, I thought it was a photo. Thanks for sharing the process.
wow! thank you so much for sharing... would be great if you could do more =)
I think it would be fantastic to see more tutorials from you!
Very interesting indeed!!!
Love this tutorial. Thanks for sharing! I'd love to see more...
I really enjoy art process/progress weblog posts like this. I'd love to see more!
Thank you! It was very clear and helpful!
honey, this is just so useful and I totally love it, and I thought it was a foto at the first glance too, thx for sharing and please do more tutorial like this!
:D
This was very helpful. I have a friend who works almost exclusively with markers and I will be glad to show him this. He well find it most helpful.
This makes me school (well, almost). Although you forgot to include the fact that you may get a buzz from those chartpak markers after rendering for an extended amount of time.
Excellent demonstration and post. I like your second paragraph because it is so true. I tell my students that also. Do you complete your demo first or do you have your students do a couple of phases then watch you do a couple more phases??? Just curious.
Yay!!! Glad ya'll are digging this.
Great question Terry. I've been completing the demo in its entirety and then having students work at their desks on their own. You're making me think about trying it the other way though...hmmm.
What do you do?
I love this little tutorial. I would appreciate more tips!
Oh how cool. But I'm a design geek, so you should expect a comment like that from me. Do you find that your students are willing/interested to experiment w/different approaches? Or do they want to know what works best, then go from there? Just curious (comparing teaching notes).
Egh - AD Markers! Before they changed their solvent, they were wickedly potent. So nice and juicy, and SOOO toxic. They were ultimately banned from campus. Bring back memories of markers and Bienfang marker paper... I use Copic brand now, and really like the line of markers that have the brush-nib...
Another great question Wendee!
I've found that they are very willing to experiment...the key is giving them the freedom to do so as well as projects that encourage it.
In the last couple of weeks while learning to draw perspectives, I gave students the assignment of rendering a space using a variety of media. In other word, their perspective was divided into four parts, each a different paper and media (i.e. velum with marker, canson with watercolor...) This was a lot of fun.
i loved seeing your technique, especially how you made the shadows and highlights! keep 'em coming.
This was wonderful! Thanks so much for the easy to follow tutorial. I didn't notice the fingernails at all!
Please do more!
xoxo
now this is super groovy and so helpful! thanks for showing us your process - more please!!
completely amazing anduseful and brilliant.
I loved seeing the process! I have never used markers, so not only was this a new medium for me but it was really interesting to see the progression as the drawing developed.
I agree with everyon else, more progress demos/tutorials. Yes please!!!
Gosh, thanks for the tutorial. I use markers often. I only have crayola markers left over from a Grands visit but they work fairly well. I haven't thought of using colored pencils with the markers. It will be fun trying this.
I really enjoyed seeing your process! I learned from it- to do swirly stokes instead of lines- even though I rarely use markers, I like gleaning such helpful tips for possible use down the road! Thanks for taking the time to share with us!
Suzanne! I will go to sleep tonight knowing more than i did getting up this morning. I loved this post. And it does make me want to put my hands on some Copic markers!
Bravo and thanks for the cool demo!
This was great! Thanks!
Very helpful indeed. I have some Copic markers, but only use them for airbrushing once a year or so, never for colouring. I need to try that. Thanks for sharing!
Loved it! Would welcome more....
this was great, more please!!
Great tutorial!I'm allways trying to learn something as I had little art lessons...:(...Thank you for sharing!
Loved it so definitely yes, more please!
I love it! As a non-artist, I would never have guessed how methodical your process is, nor how involved.
I got a lot out of it, and now I'm tempted to buy some of your markers and some good paper...
more please-I thought this very informative and now i am inspired to try drawing one of my own chairs at home! Loved it!
Thank you for this tutorial. I didn't know you could put colored pencil on top of markers! Awesome!
Could you please let us know what type of paper you prefer? The paper I use bleeds alot..so I don't use markers, but would love to. Thank you in advance!
Thank you for the tutorial. I learn a lot from the generous artists who share their techniques on their blogs.
I love it!! If you published a book with instructions like that, I'd buy it right away. Short of videos, I find this kind of detailed step-by-step instruction (with nice close-up photos) the most useful. With it, I could even teach my kids art!
That was amazingly eye-opening! Love it! I cannot wait to try it at home!
Love the markers, am going to look for some right now!
Wonderful demo Suzanne. I hope you'll share this type of demo more often. Thanks
helpful yes, and it did relax me, that chair.
markers relax me too -
Iloved it and learned alot, please do it again.....
Suzanne, I really miss having drawing class with you. You are very talented and inspirational. I like seeing this kind of thing on your blog--it makes me feel like I am still in your class. Do more! :)
I would have thought that this was a digitally coloured drawing had you not told us how it was done.
U-N-B-E-L-I-E-V-A-B-L-E-!
I liked it. Do some more of those.
I want this chair! Thanks Suzanne! Not only do your students appreciate it but also those that wonder how the heck you do what you do! :)
Here's another vote for demonstrations of your process.
Neat.
I love your drawing style. Please keep posting sketches and tutorials!
Very cool demo. Bagus sekali as we say in Indonesia. Thank you for letting us see your amazing process.
It is so great to get instruction. More please. Off to buy markers...
Oh, and thanks. I love your blog!
I loved watching you transform that drawing, very cool! You must be a fantastic teacher. :)
Would absolutely love to see more of such tutorials. I have only recently started sketching again - almost after 5 years of not touching the pencil. Thank u so much for sharing this! Its very inspiring....
LOVE. IT. I just taught a rendering and delineation class, wish I had shown this to my students. Amazing work, creativity, mind!
Love this tutorial. I find this technique very refreshing -- no Photoshop necessary. I will definitely give it a whirl and post my results. Thanks so much!
Post a Comment